The events calendar system on the VYC web site is the hub of the way the club communicates with members and the public about what is happening at VYC and other events of interest around Banderas Bay. Events that are added to the club's calendar are used in a number of ways:
- They can be shown on the club Master Calendar
- They can be shown on individual, specialized calendars for areas like On-the-Water, Junior Sailing, etc.
- Events can be displayed on the front page of the club web site as a list on the right side of the screen
- Appropriately tagged events can be sent to the membership weekly in the club "What's Happening" newsletter.
Making this happen requires only a few simple things:
- An event title
- The dates for the event (and if it repeats)
- A brief description of the event
- A small image
- The location of the event
- A contact person
- What specific area the event applies to, for example, Ashore Activities, Afloat Activities, Junior Sailing, etc.
- Whether notice of the event needs to be sent to membership weekly via the weekly newsletter.
Follow these steps to create an event on the club calendar:
Login
Creation of events are available to club members with a userid and password on the club web site, and the appropriate "Publisher" permissions.
To log in, click the "Login" button on the top of the front page of the VYC web site

and then you'll get a pop-up asking for your user id and password

If you have successfully logged in, and your have Publisher authority, you will see a new "Publisher Menu" appear on the top row

Passing your mouse over the publisher menu gives a list of what you can do as a publisher. In this case, we are interested in the "Create a Calendar Event" item.
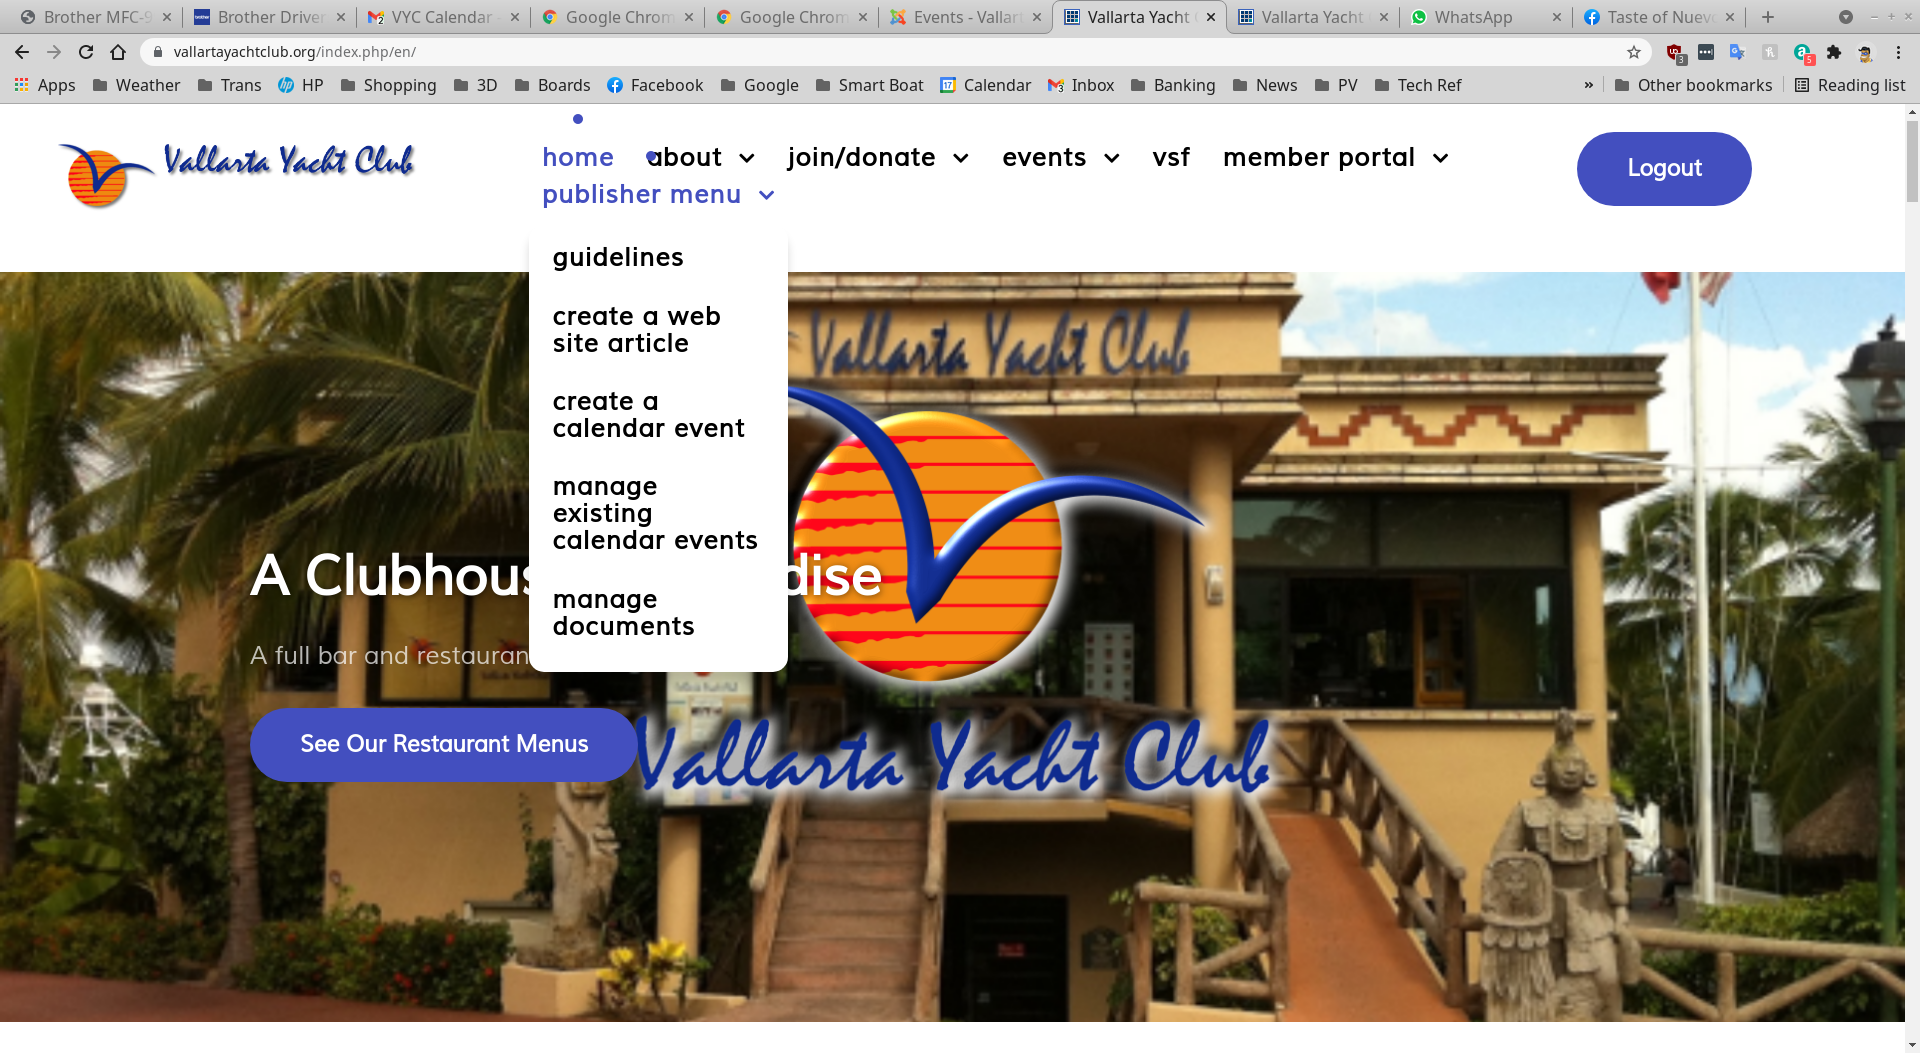
Clicking on "Create a Calendar Event" opens a new Event item
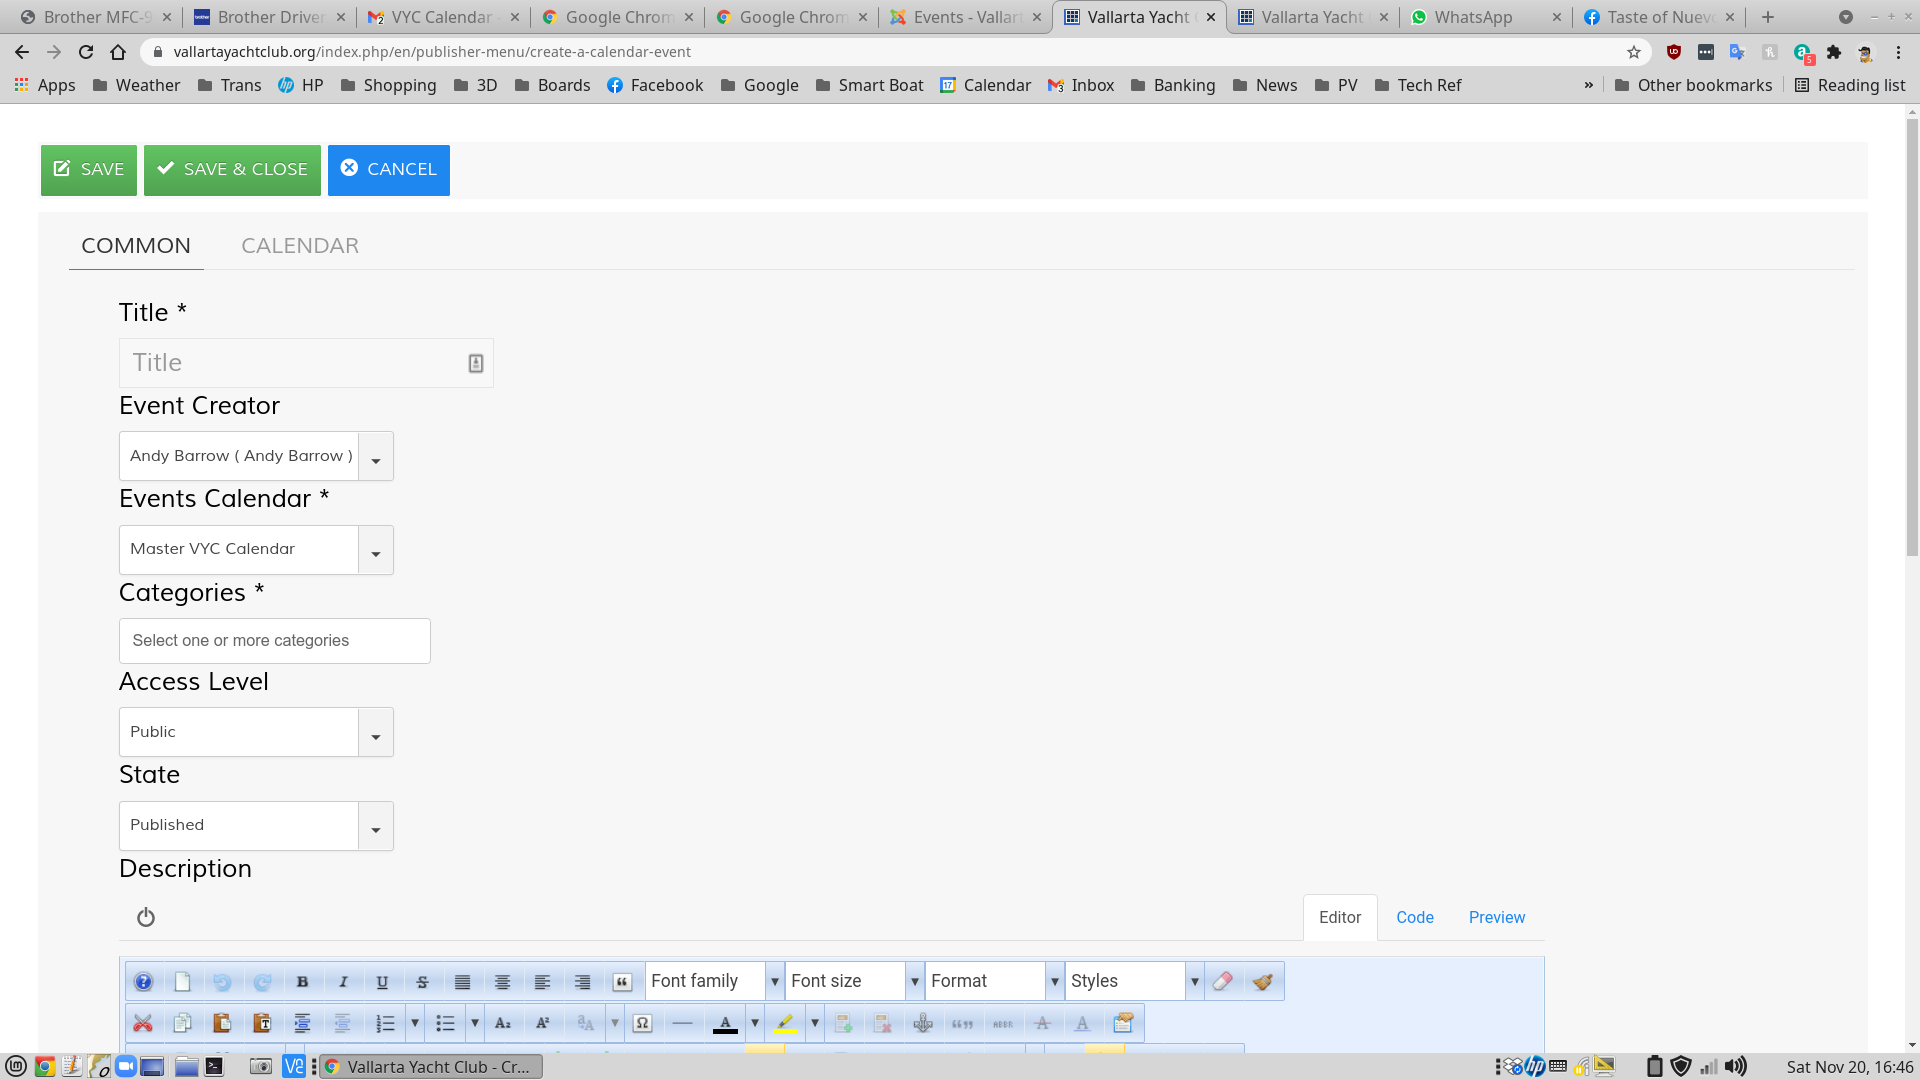
On the top part of the "Common" screen, you need only Title and Category. Click on the category and choose the category most appropriate for your event. You can have more than one category. Important: if you want your event to appear on the VYC weekly "What' Happening" newsletter, add that category. DO NOT SELECT "Weekly Newsletter" AS THE ONLY CATEGORY. IF YOU DO, YOUR EVENT WILL NOT APPEAR ON THE VYC MASTER CALENDAR OR THE FRONT PAGE EVENTS LISTING.
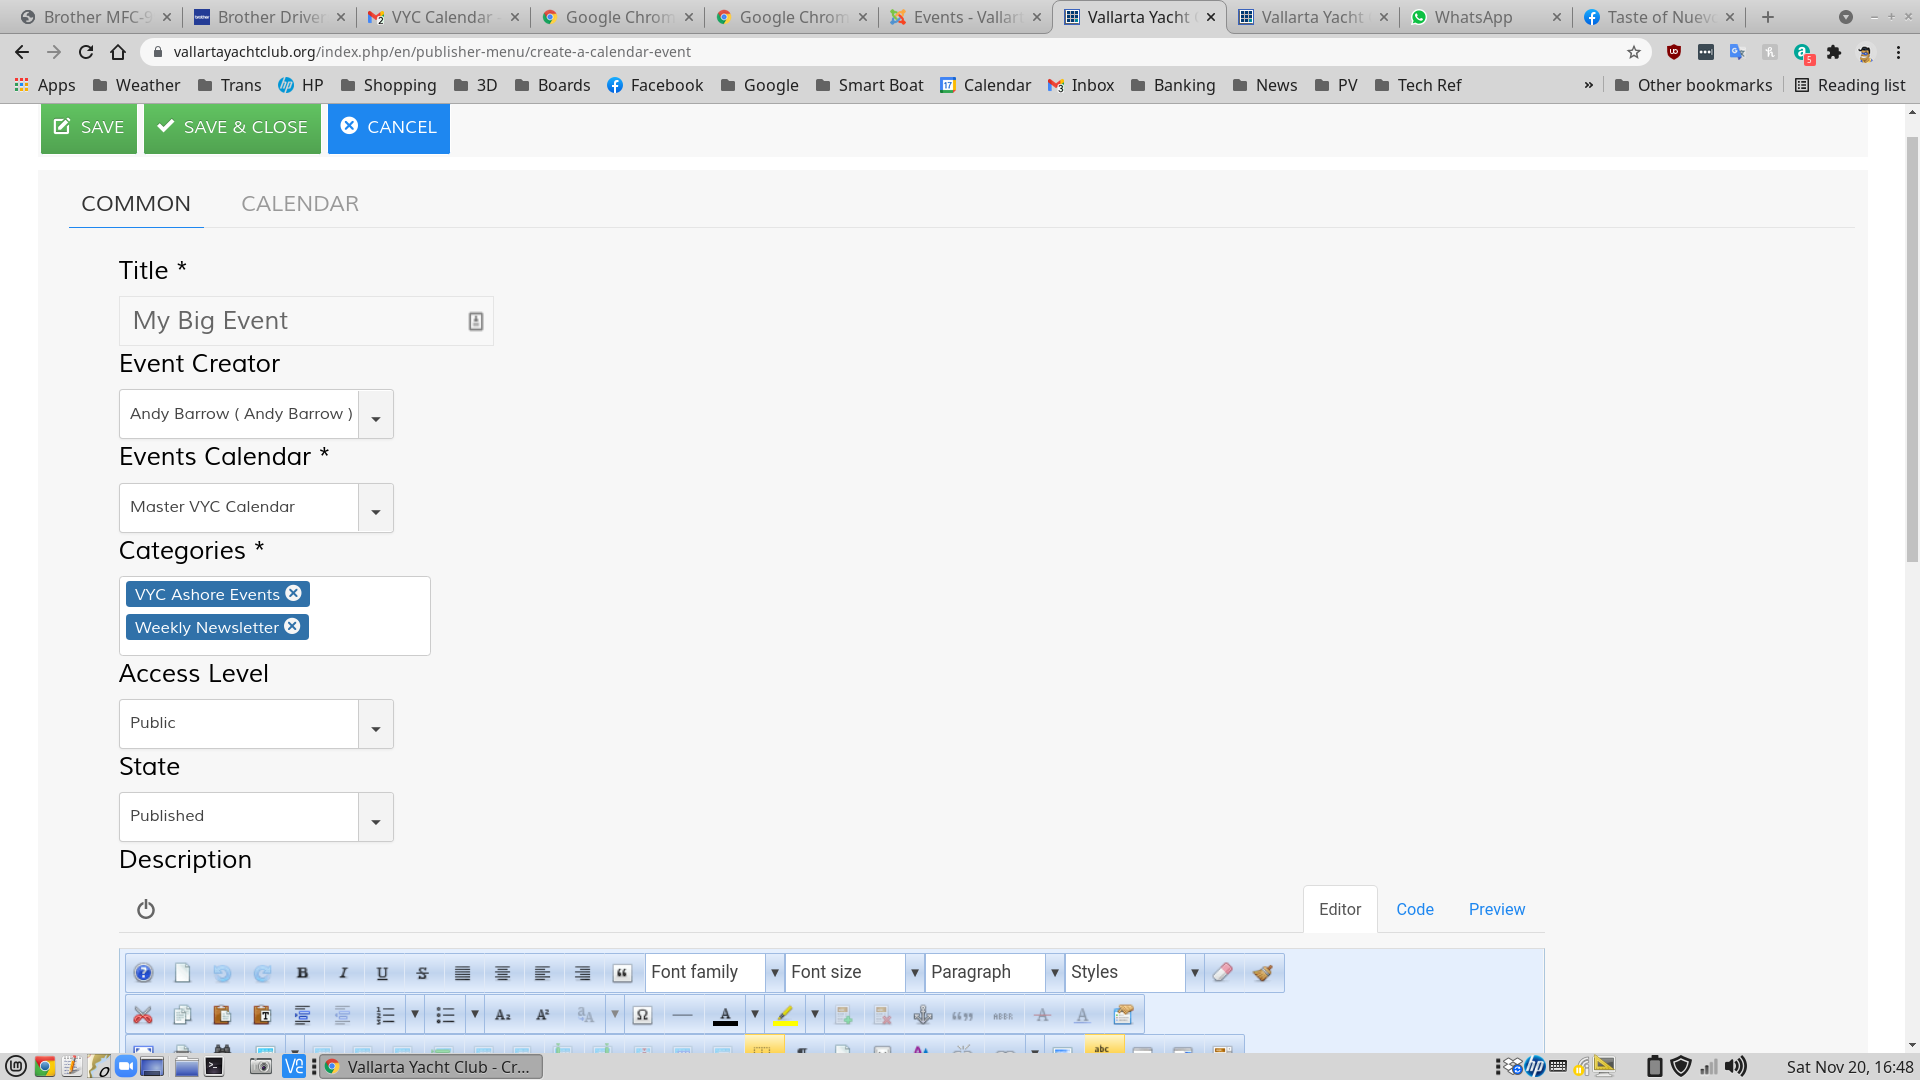
The bottom part of the page is for the description of the event, the image, the location, and the contact
IMPORTANT: YOUR IMAGE SHOULD BE NO BIGGER THAN 150 PIXELS HEIGHT OR WIDTH, AND IT SHOULD BE AT THE BEGINNING OF YOUR ARTICLE. Just dropping an image anywhere in your article doesn't work. If you image is too big, just set it to 150 in the image settings, as described below.
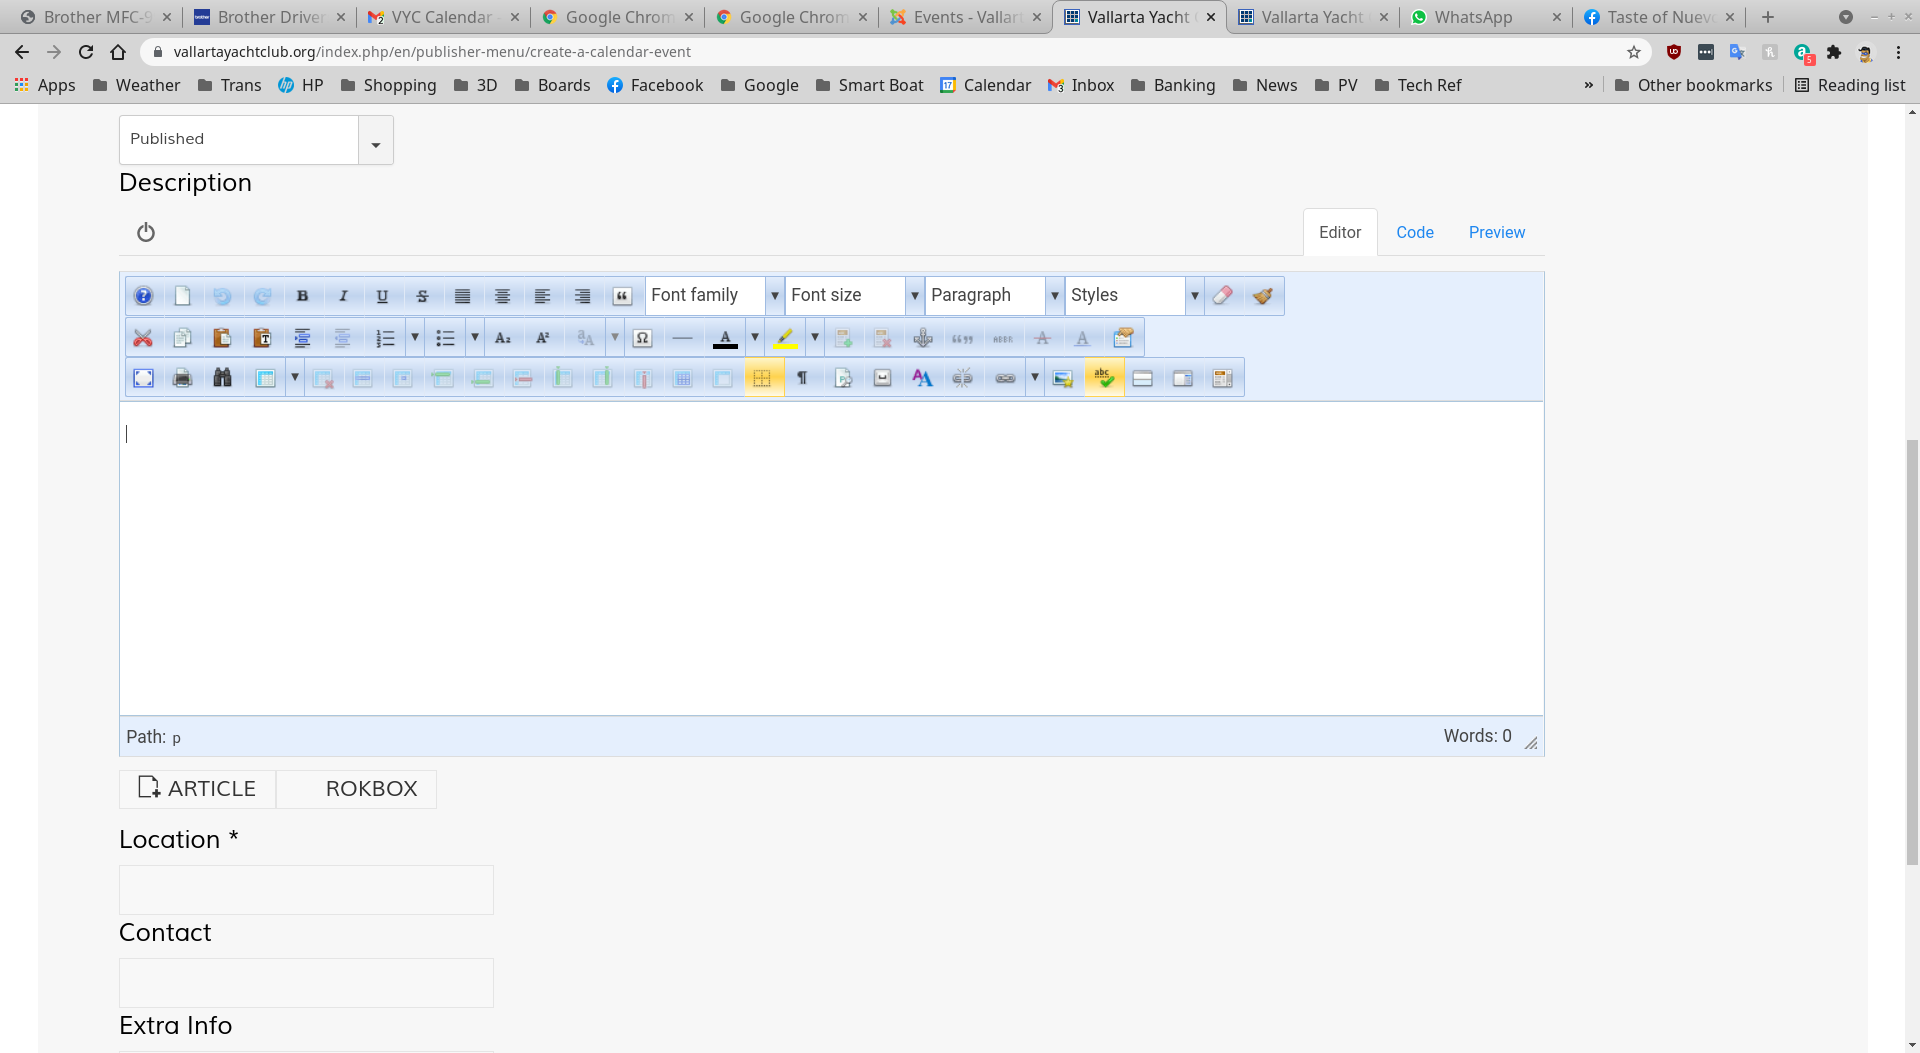
First, add your image. It needs to be small (150 pixels on one side). Place your cursor at the very top left of the Description window, and click the small photo frame with the little star
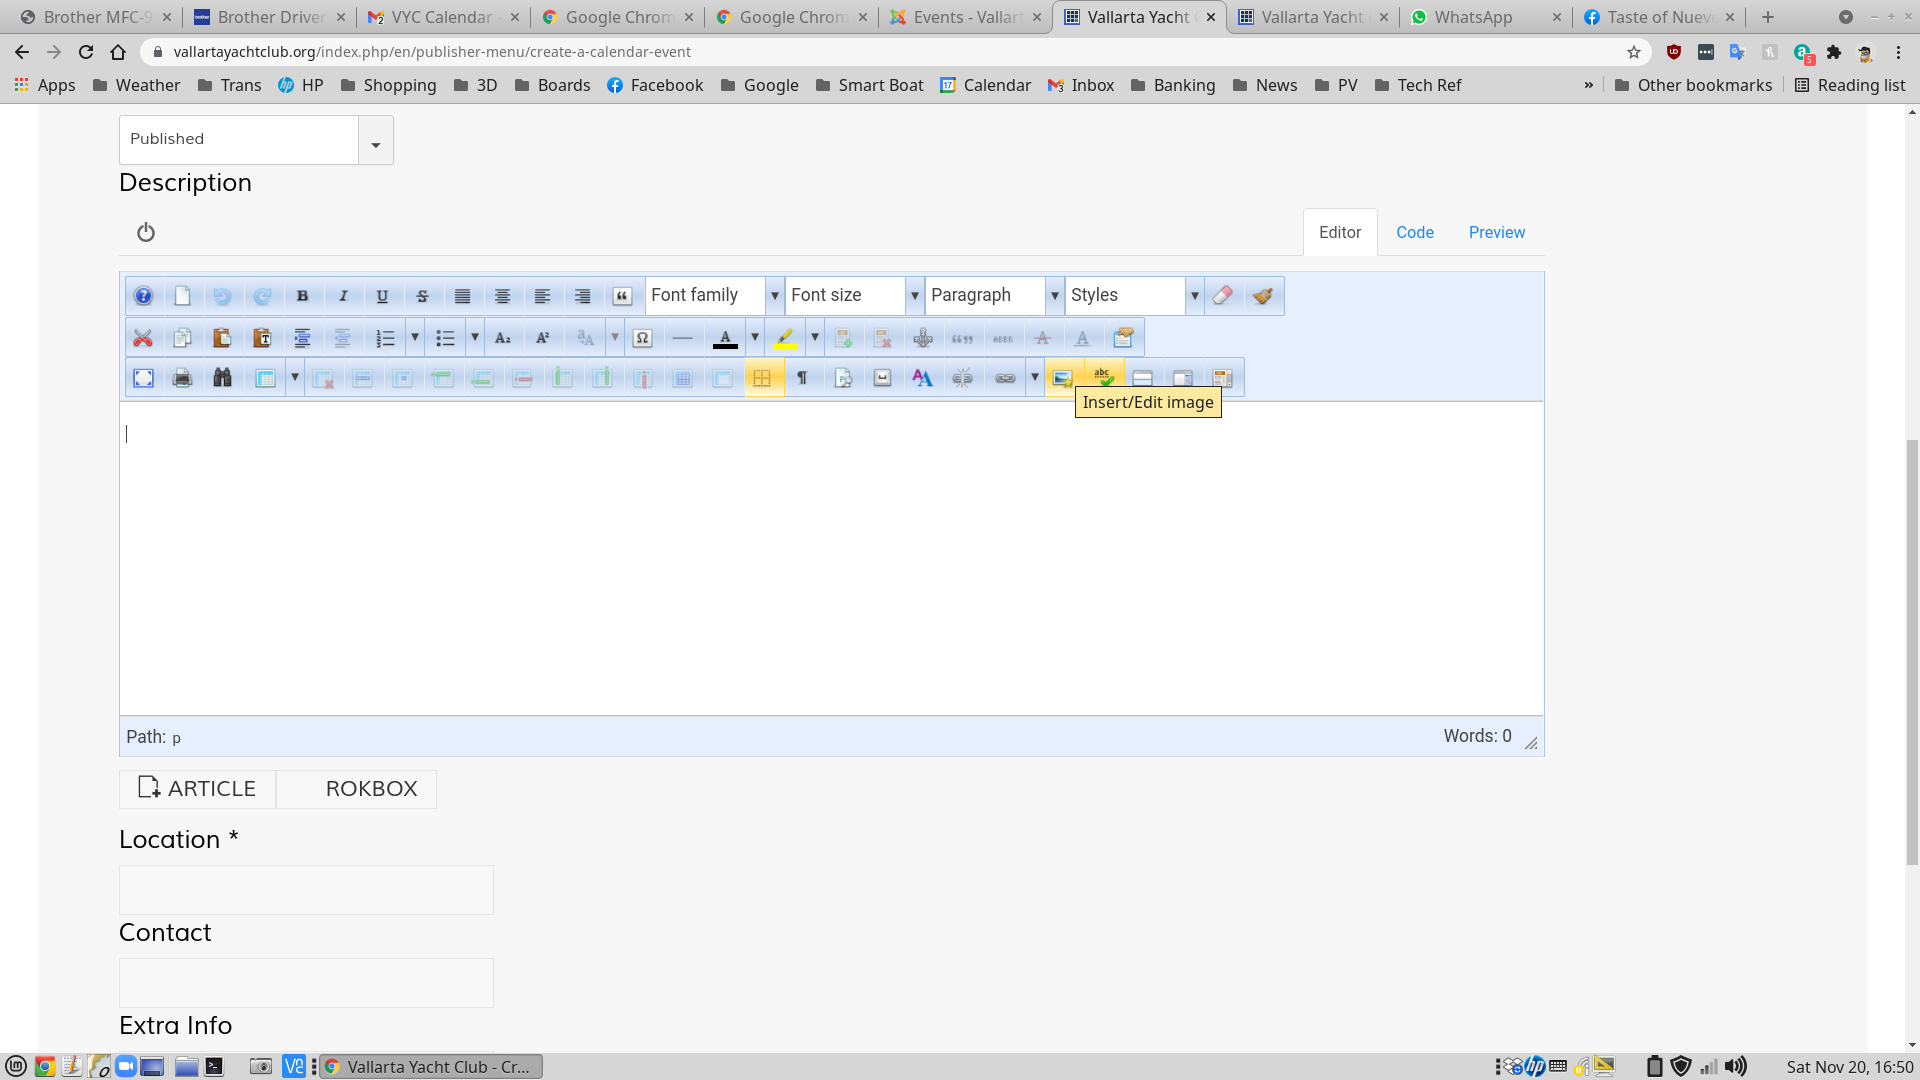
That will open the image insert/upload window. There might already be an image in the "CalendarPics150x150" directory. This directory is the one we use for all images that are put on calendar entries. If you need to add a new image, please put it in this directory so others can use it in the future.
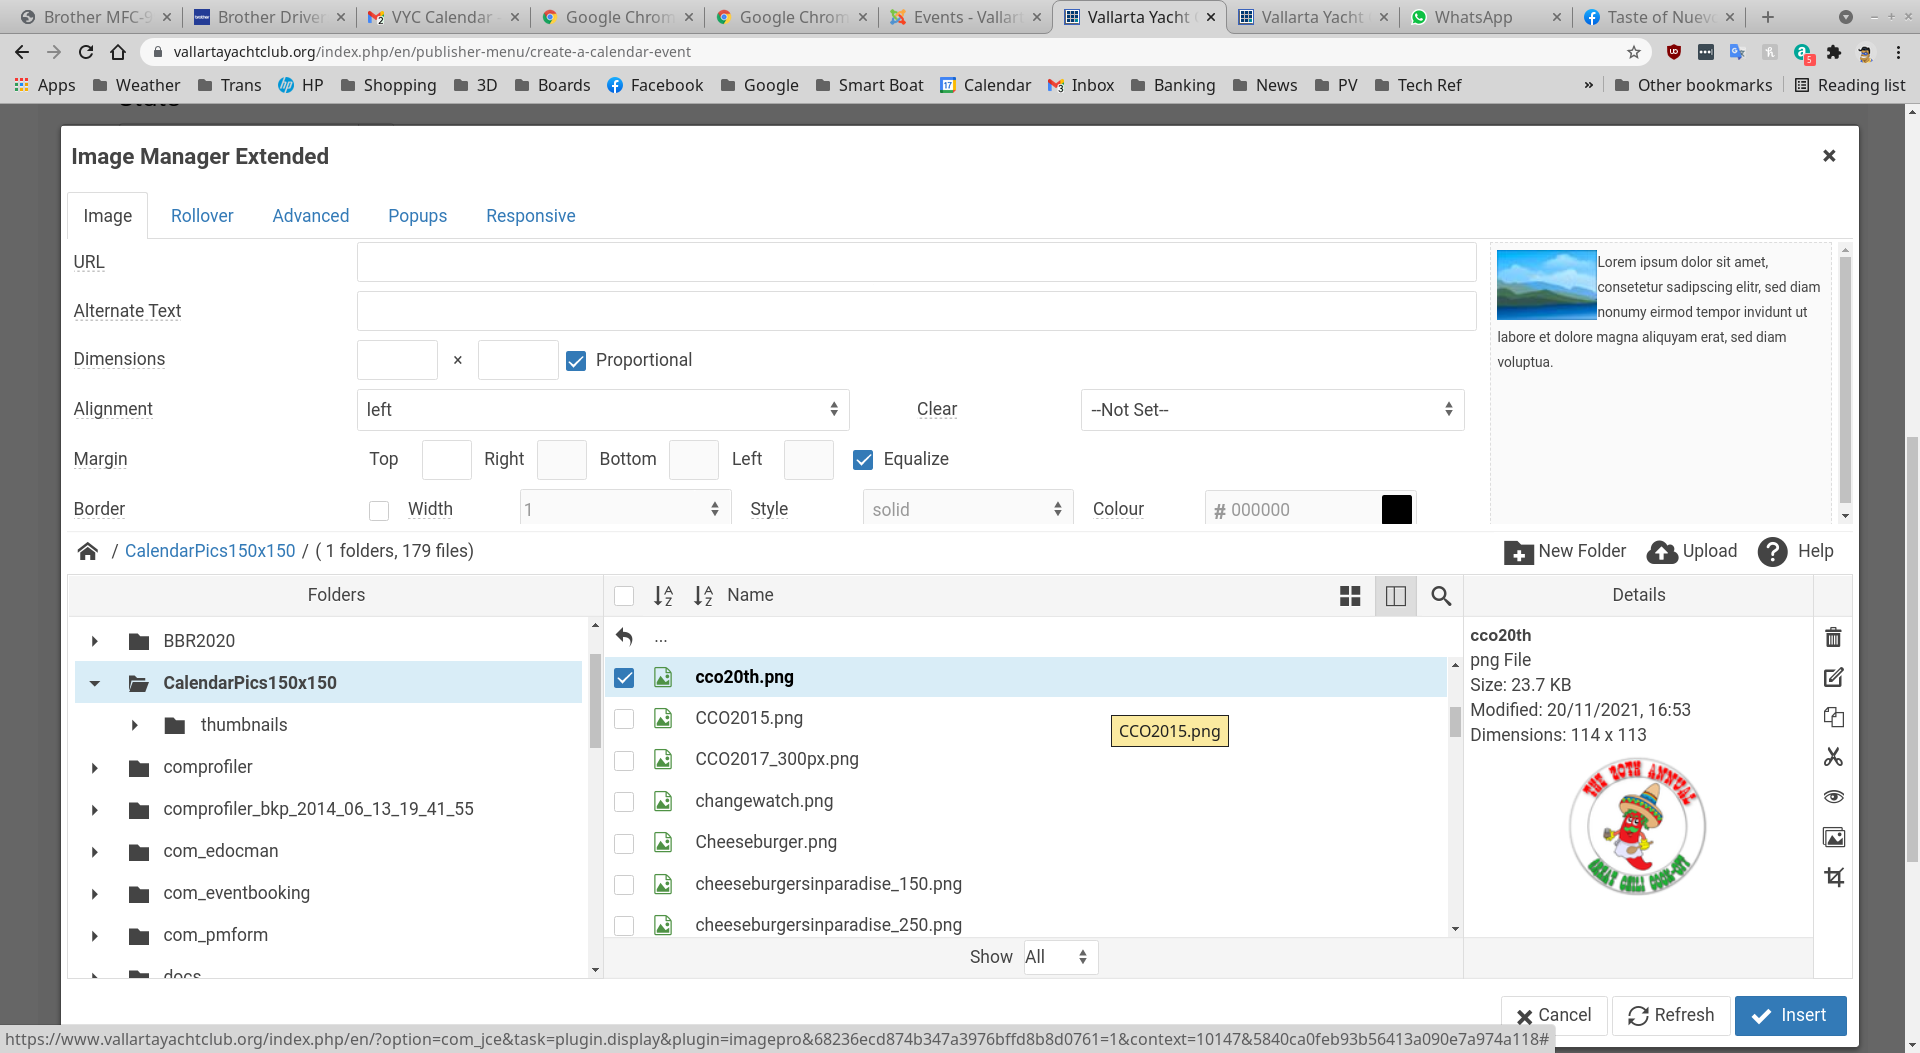
In the middle area of the image screen, you will see the list of images. As you scroll through them, you will see the image on the right side. If you see an image you want to use, just select the image (it will be in bold) and click the "Insert" button on the lower right.
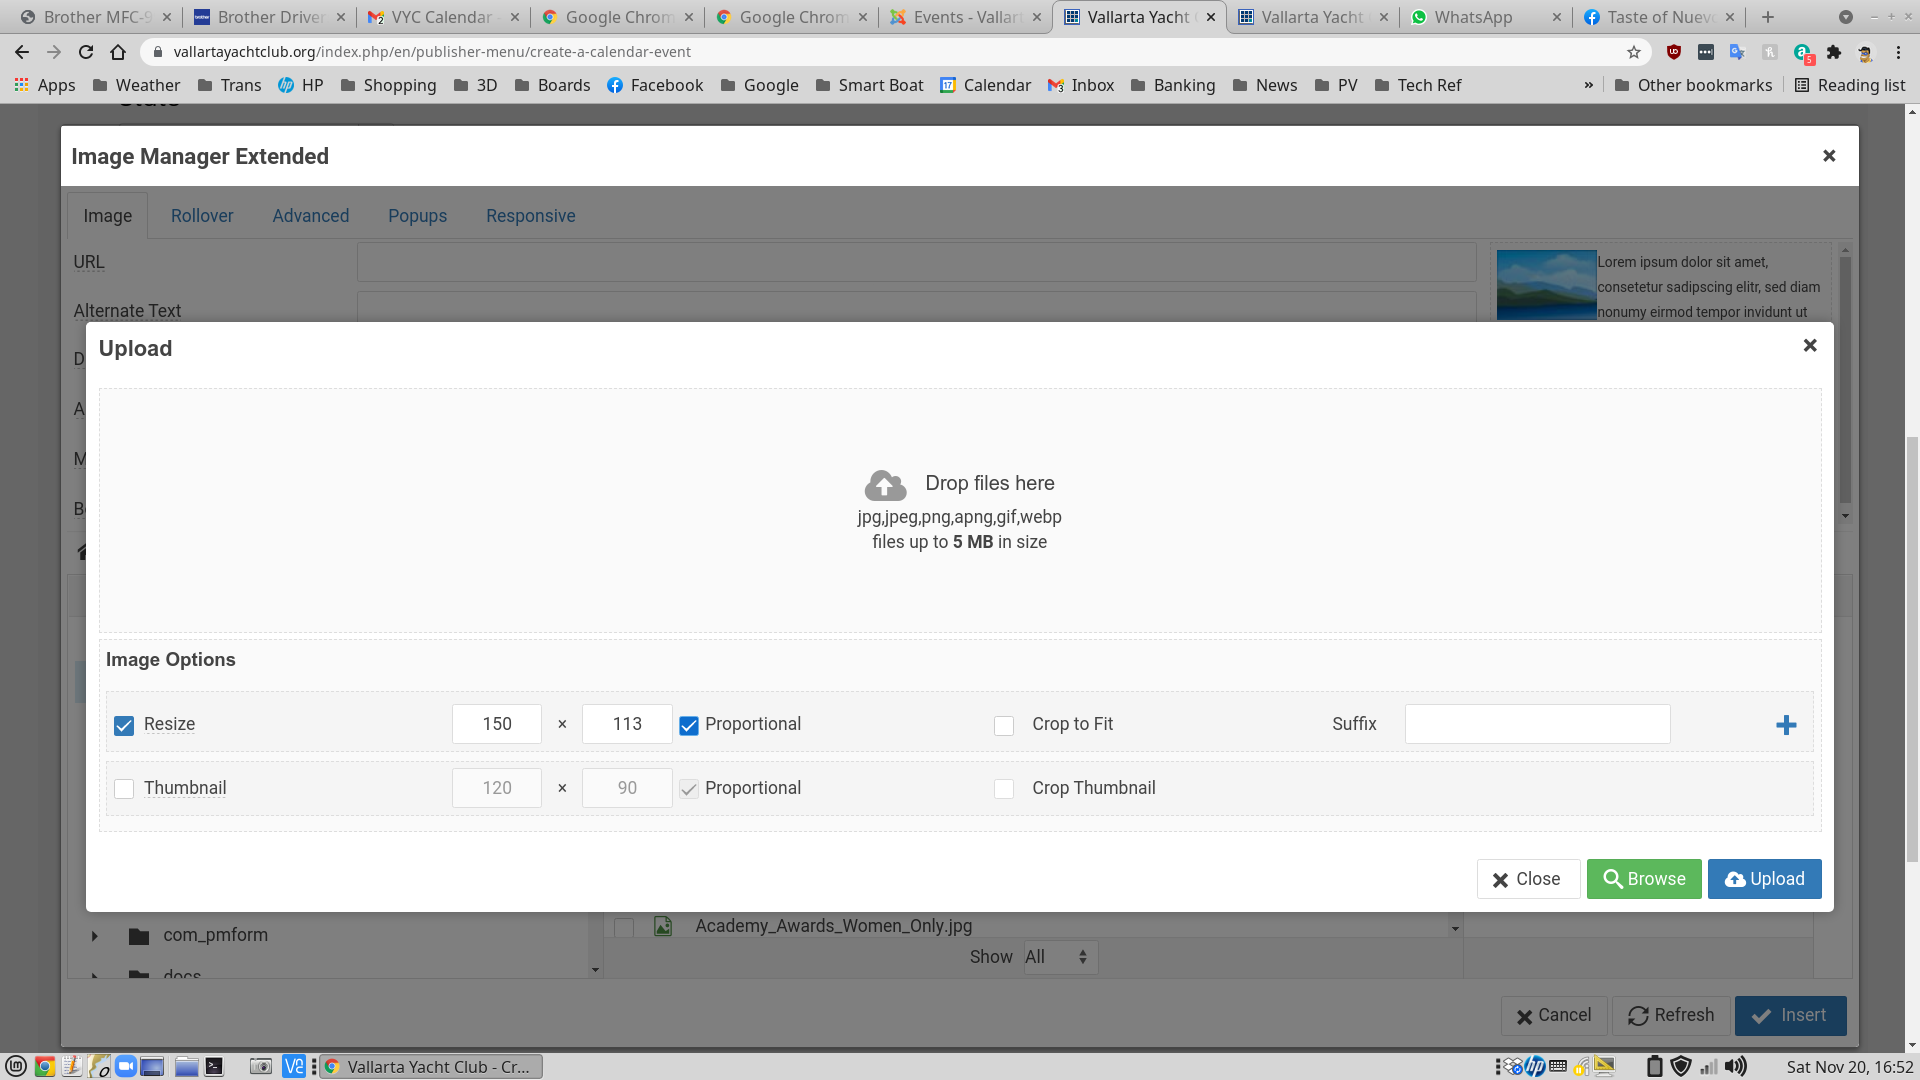
If you have a new image you wish to insert in your calendar event, Click "Upload" on the middle right of the screen.
 .
.
Here you can upload a new image, and resize it at the same time if necessary. Again, please try to start with an image that is small, rather than uploading a large image and attempting to scale it down to 150px. You will find that detailed images just don't work - the image needs to be just a simple clip-art or something with little or no text. Just follow the instructions. You can select the image you want to upload from your computer by clicking "Browse" in the lower right, or by just dragging the image into the middle area. You can resize the image using the "Resize" check on the lower left of the panel. When you are ready, click "Upload" in the lower right.
When upload is complete you will be returned to the image selection screen. The new image you have just uploaded will be selected and highlighted, but it will not be inserted into your article until you click the "Insert" button on the lower right. When that is done, you will be returned to the edit screen, and your image will be in the edit area, on the left side.
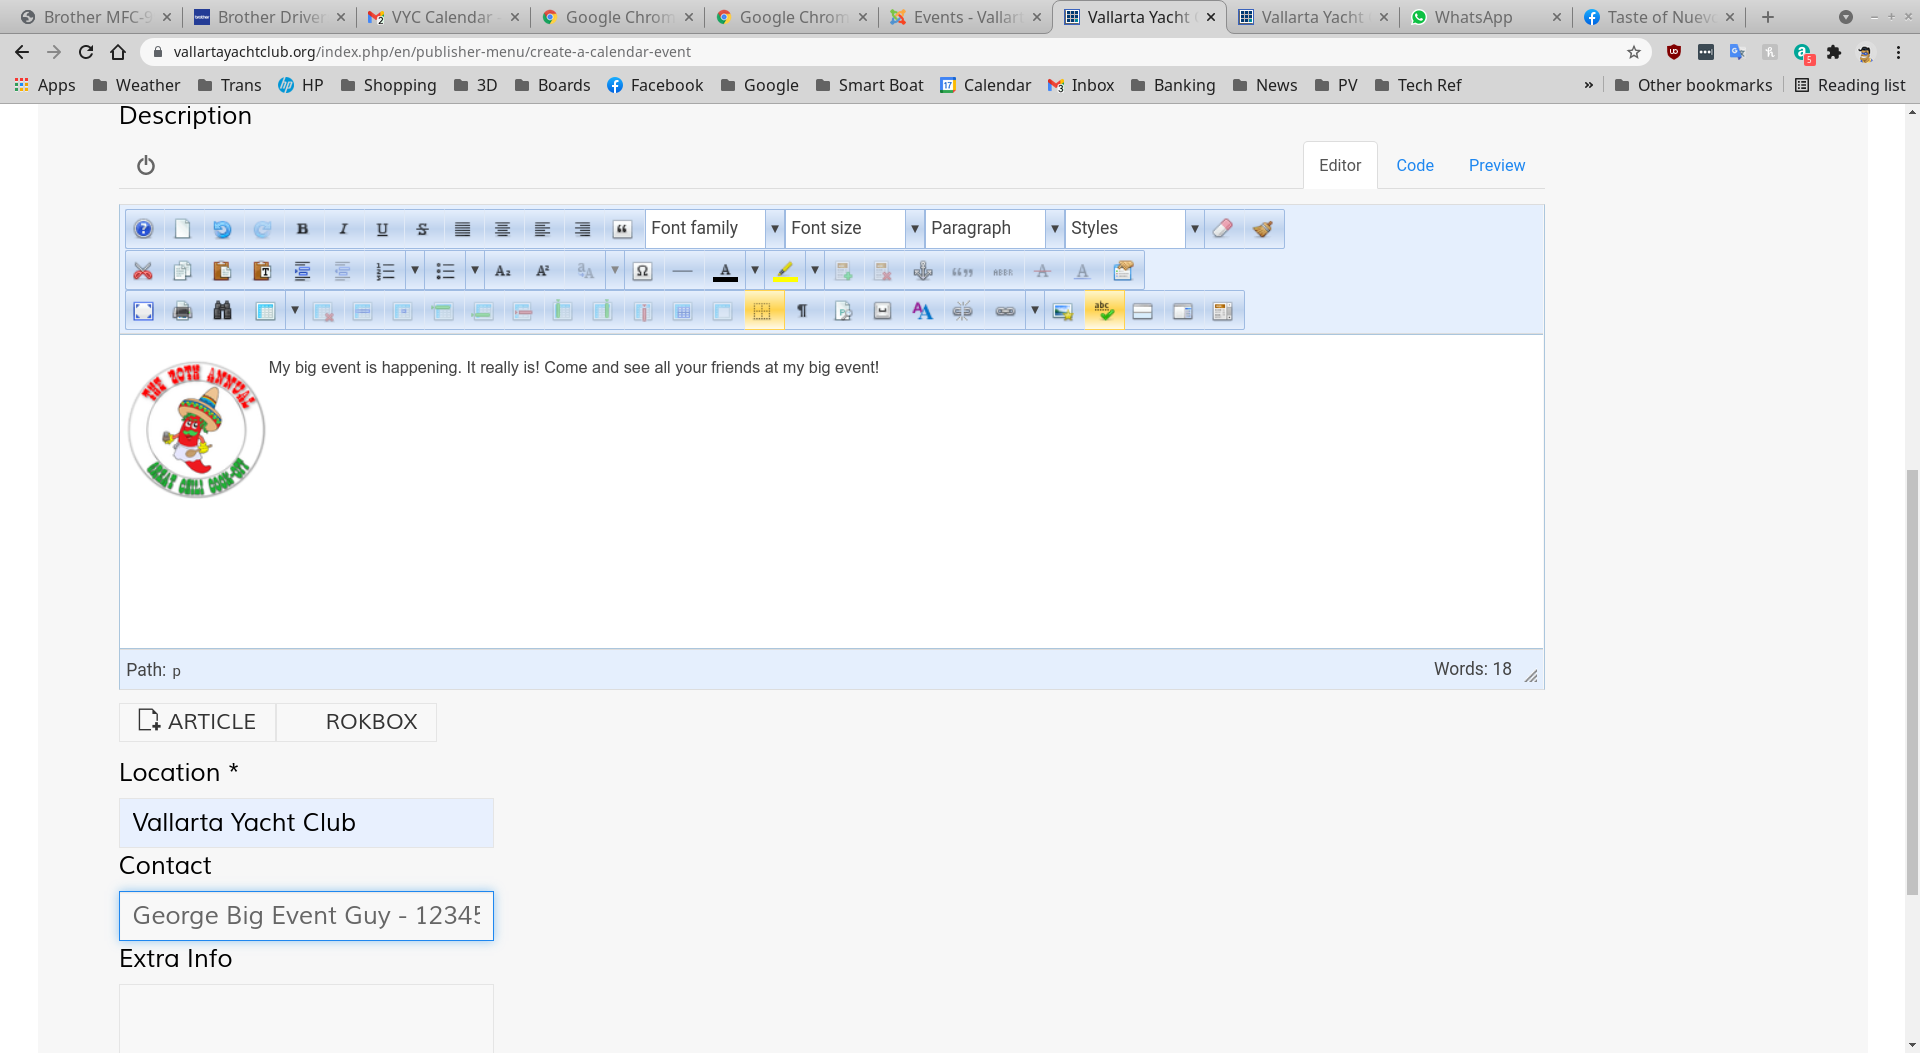
Next, just place your cursor after the image, and start typing. You need to keep your text to be less than 600 characters.
When the description is done, below the description panel you'll need to make sure you have entered the location and the contact for the event.
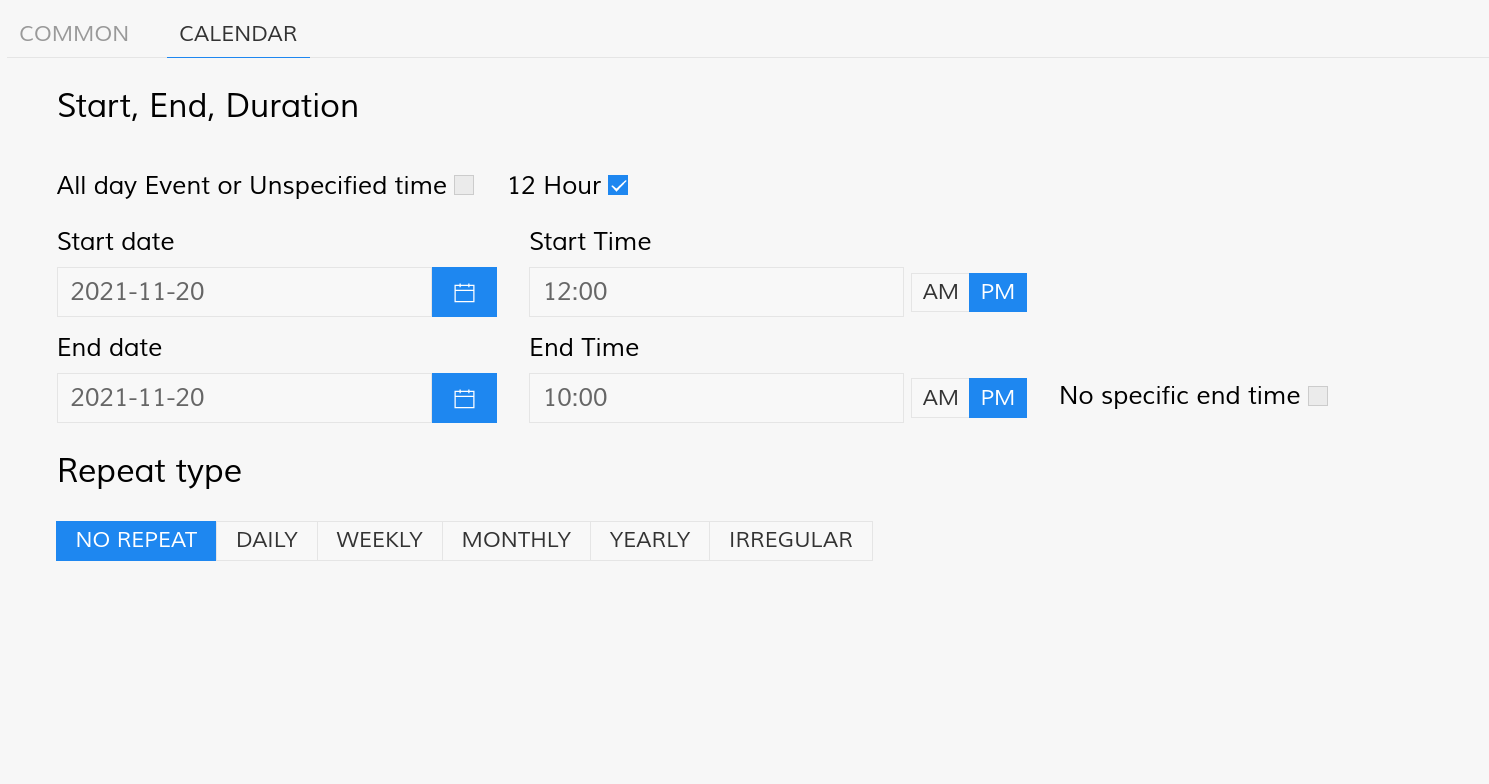
You are almost done! All you need to do now is enter the date and time of the event. At the top of the screen, click "Calendar".
Here you can enter the start and end dates of the event. If it is a multi-day event, enter the date of the start and the date of the end - a multi-day event IS NOT a repeating event. You can also enter start and end times. If it is a regularly repeating event, for example weekly or monthly, you can click one of the repeat options. and answer the appropriate questions.
THAT IS ALL YOU NEED TO DO! All that is left is to "SAVE AND CLOSE" your event. It will be automatically published to the club calendar, and will be sent out weekly if you selected that option.
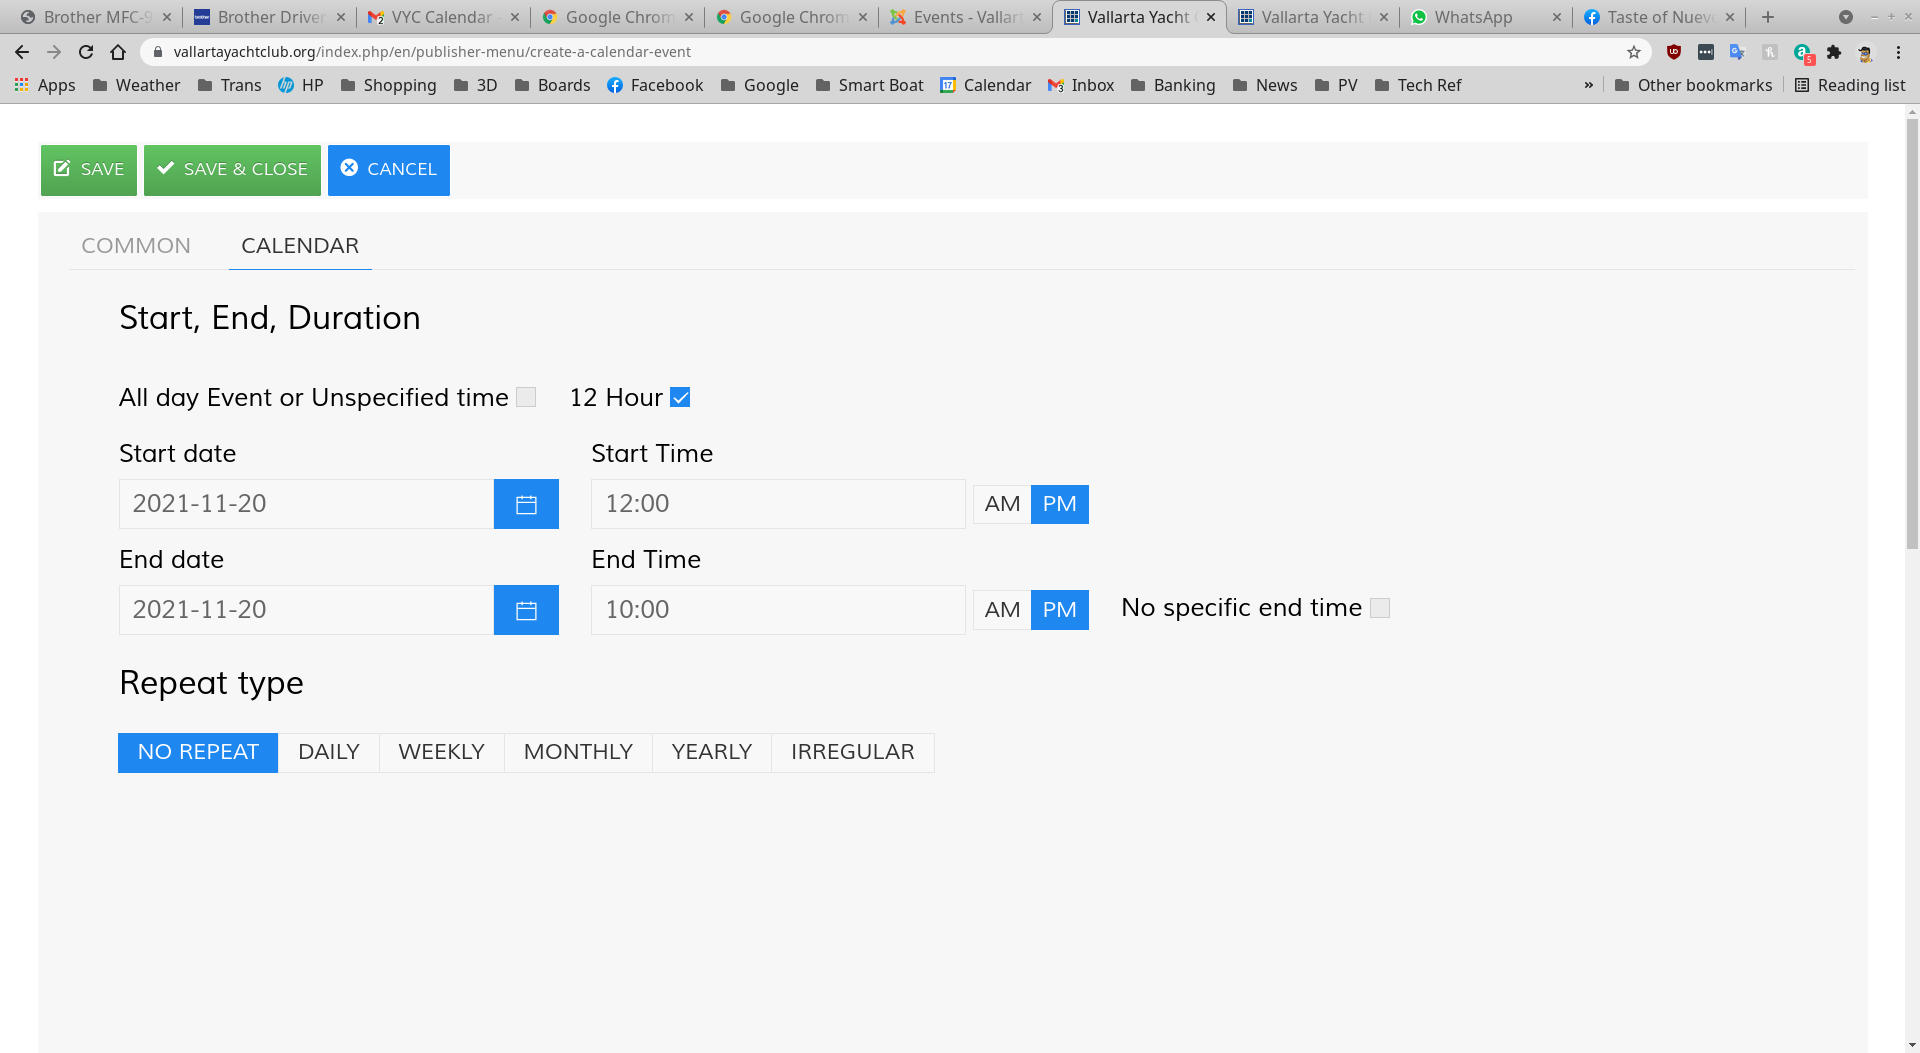
Did you make a mistake or just need to change something on an event? No problem. Go back to the VYC Home Screen, select "Publisher Menu" and "Manage Existing Calendar Events". You will be presented with a list of events in the system. Just select the event you want to edit. You will be presented with the same screens as you see above. Just edit, save, and close.